Unleashing Your Creativity: A Comprehensive Guide to KineMaster Video Editing
KineMaster has emerged as a leading video editing app, empowering both amateur and professional creators to craft compelling visual stories on their mobile devices. This guide will walk you through the essential features and techniques of KineMaster, enabling you to harness its power for your own video editing projects.
1. Getting Started:
- Installation: Begin your KineMaster journey by downloading and installing the app from your device’s app store (available on both Android and iOS).
- Project Setup: Launch KineMaster and tap the “+” icon to create a new project. You’ll be presented with various aspect ratio options (16:9 for YouTube, 9:16 for Instagram Stories, 1:1 for Instagram posts, etc.). Choose the aspect ratio that best suits your intended platform and video style.
2. Importing Media:
- Accessing Media: Tap the “Media” button in the main menu. This will open your device’s gallery, allowing you to browse and select the video clips, photos, and audio files you want to include in your project.
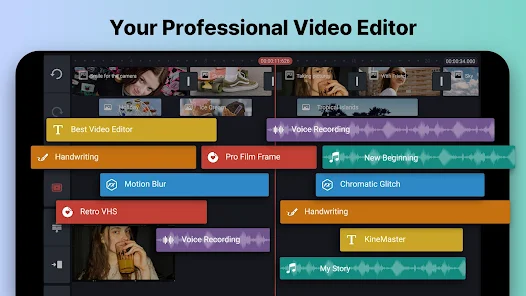
- Adding to Timeline: Once you’ve selected your media, drag and drop each item onto the timeline at the bottom of the screen. The timeline is where you’ll arrange and edit all the elements of your video.
3. Basic Editing:
Related articles 01:
1. https://kinemasterap.org/kinemaster-2025-unveiling-the-future-of-mobile-video-editing
2. https://kinemasterap.org/753-2
3. https://kinemasterap.org/3-of-the-easiest-video-editing-apps-including-kinemaster
4. https://kinemasterap.org/kinemaster-unlocking-professional-video-editing-on-your-mobile-device
5. https://kinemasterap.org/mastering-creativity-the-kinemaster-5-experience
- Trimming and Splitting: To trim a clip, tap to select it on the timeline, then drag the edges of the clip inwards to shorten its duration. To split a clip into two separate segments, tap the clip and select “Split” from the menu. This allows you to insert other elements or apply different effects to each segment.
- Reordering Clips: To change the order of your clips, long-press and drag them to different positions on the timeline. This is essential for structuring your video’s narrative.
- Adding Transitions: Smooth transitions between clips can enhance the flow of your video. Tap the transition icon that appears between two clips on the timeline, and choose from a variety of transition effects (fade, dissolve, slide, etc.). Experiment with different transitions to find the ones that best suit your video’s style.
4. Enhancing Visuals:
- Color Adjustment: Tap a clip on the timeline and select “Color Filter” to explore a range of pre-set color grading options. You can also manually adjust parameters like brightness, contrast, saturation, and sharpness to fine-tune the look of your video.
- Speed Control: Adjust the playback speed of clips to create dramatic slow-motion sequences or dynamic fast-motion effects. This can be used to emphasize specific moments or add a sense of energy to your video.
- Chroma Key (Green Screen): If you’ve filmed footage against a green or blue screen, you can use the chroma key tool to remove the background and replace it with another image or video. This allows you to create unique visual effects and composite different elements seamlessly.
5. Adding Audio:
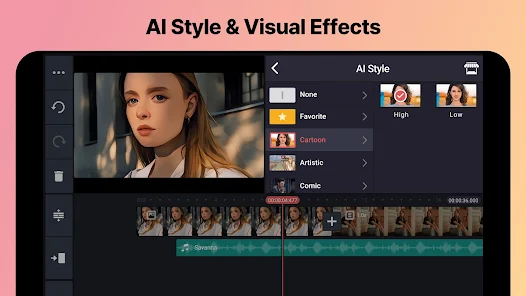
- Background Music: Tap the “Audio” button to import music tracks from your device’s library or browse KineMaster’s extensive built-in asset store. The asset store offers a wide variety of royalty-free music to suit different moods and styles.
- Voiceovers: Add your own narration or commentary by recording voiceovers directly within KineMaster. Tap the microphone icon and start recording when you’re ready.
- Audio Adjustments: Fine-tune the audio levels of each track by using keyframe animation. This allows you to create smooth fades, volume increases, or dips at specific points in your video.
6. Text and Graphics:
- Adding Text: Tap the “Layer” button and select “Text” to add text overlays to your video. Customize the font, size, color, and style of your text to match your video’s aesthetic. You can also add animations to make your text appear and disappear in creative ways.
- Stickers and Emojis: Browse KineMaster’s library of stickers and emojis to add fun and expressive elements to your video. These can be used to emphasize emotions, highlight key moments, or simply add visual interest.
- Handwriting: Use the handwriting tool to draw directly on your video. This can be useful for adding annotations, creating unique visual effects, or adding a personal touch to your edits.
7. Advanced Features:
- Keyframe Animation: Keyframe animation allows you to create dynamic changes in video and audio effects over time. By setting keyframes at specific points on the timeline, you can control the intensity and timing of effects with precision.
- Blending Modes: Experiment with blending modes to create unique visual effects by combining layers in different ways. Blending modes like “Multiply,” “Screen,” and “Overlay” can produce interesting visual results and add depth to your video.
- Layer Masking: Layer masking allows you to selectively apply effects or hide portions of a video layer. This gives you greater control over how different elements interact with each other.
8. Exporting Your Video:
- Export Settings: Once you’re finished editing, tap the “Export” button. You’ll be presented with options to choose your desired resolution, frame rate, and video quality. Select the settings that best suit your needs and the platform where you’ll be sharing your video.
- Sharing: After exporting, you can share your video directly to popular social media platforms like YouTube, Instagram, TikTok, and Facebook. You can also save the video to your device’s gallery for later use.
Tips for Mastering KineMaster:
Related articles 02:
1. https://kinemasterap.org/mastering-creativity-the-kinemaster-5-experience
2. https://kinemasterap.org/kinemaster-2025-unveiling-the-future-of-mobile-video-editing
3. https://kinemasterap.org/elevate-your-content-with-the-kinemaster-app
4. https://kinemasterap.org/kinemaster-unlocking-professional-video-editing-on-your-mobile-device

- Utilize the Asset Store: Explore KineMaster’s asset store for a wealth of royalty-free music, sound effects, stickers, transitions, and more. These resources can save you time and enhance the quality of your videos.
- Experiment with Layers: Don’t be afraid to layer multiple video, image, and audio tracks to create complex and dynamic effects. Layering is a key technique for achieving professional-looking edits.
- Master Keyframe Animation: Keyframe animation is a powerful tool for creating smooth and professional-looking edits. Take the time to learn how to use it effectively.
- Practice and Explore: The best way to learn KineMaster is to experiment with its features and practice editing different types of videos. Don’t be afraid to try new things and push the boundaries of your creativity.
Beyond the Basics:
- Color Grading: Dive deeper into color grading techniques to create specific moods and atmospheres in your videos.
- Sound Design: Explore advanced audio editing features like equalization and audio effects to enhance the sound quality of your videos.
- Visual Effects: Experiment with KineMaster’s built-in visual effects and explore third-party plugins to create stunning visuals.
- Motion Graphics: Learn how to create simple motion graphics using KineMaster’s animation tools.
Conclusion:
KineMaster offers a comprehensive suite of tools for creating high-quality videos on your mobile device. By mastering its features and techniques, you can unlock your creative potential and produce engaging video content that captivates your audience. So, start exploring, experimenting, and unleashing your creativity with KineMaster!


